This is not the bastion host you are looking for
This is not the bastion host you are looking for!
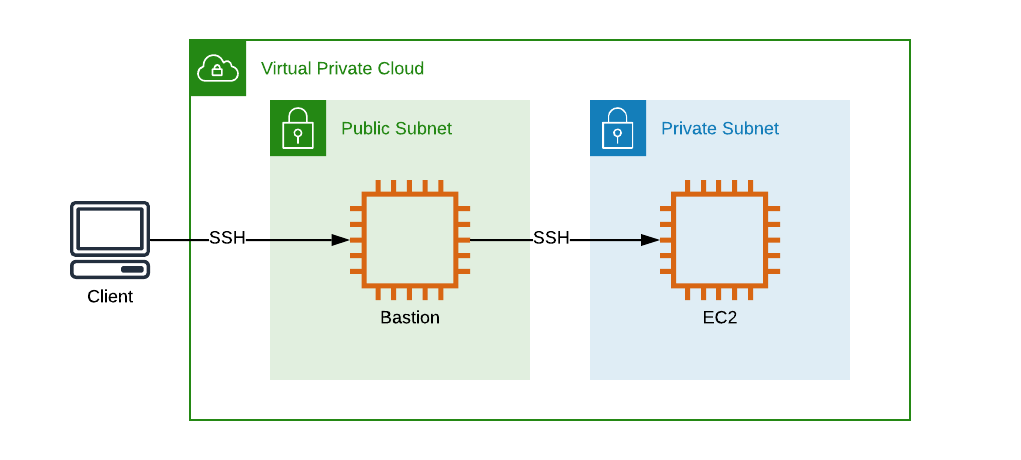
A common way to get ssh access to EC2 instances in a VPC would be to go through a hardened bastion host. Does it sound familiar? Most people use this pattern, it has been around for like forever.

This is considered a very secure pattern, you will harden the bastion host and lock it for access from your corporate ip range. But what if you have employees that work remote? Working from home with no static IP? It quickly become multiple ip ranges to handle. What if a user forget to remove his/hers home IP? We are talking about humans and we do forget things all the time. How do we handle and secure that?
And what about the SSH key? Amazon EC2 only support that you add one key on creation, sure you can add more key directly on the instance. Sure you could store the key in S3 and set it up using scripts running when the EC2 instance start. But then we need to handle key rotation for multiple keys. Also you probably don't want to store the ssh key for the EC2 instances on the bastion, but instead use SSH Agent forwarding, the keys need to be on every EC2 instance. This is getting messy and even with good scripts and processes the risk of something leaking and going wrong is high.
So how do we solve this?
It's time to remove the bastion host. Instead AWS Session Manager (or AWS Systems Manager Session Manager that the full name is, worst name ever.....) can and probably should be used unless you have a good reason not using it.
Let's go ahead and configure and setup what we need to access the instances over the Session Manager.
Session Manager Prerequisites
Before we can start connecting to our instance via Session Manager there are a couple of prerequisites we need to fulfill. We need to assign the correct IAM permissions to the instance, we need to enable network access, and some more.
IAM permissions
Our EC2 instances that we like to access through Session Manager need access to ssm, ssmmessages, ec2messages, cloudwatch, and some more. Basically allowing it to communicate with the Session Manager service and storing logs and metrics. AWS has prepared a managed policy named "AmazonEC2RoleforSSM" which contains all the permissions needed. It can be a bit to permissive for my taste, but for the sake of this blog I will use it. In production I would probably lock it down a bit more.
So let us start by creating a role that we can use with our EC2 instances. I will create a role named "SessionManagerBlogDemoRole" and attach just the managed policy "AmazonEC2RoleforSSM".
Network communication
Our instance need to be able to communicate with Session Manager over the network. so either it needs access to internet or we need to create VPC endpoints to enable this. Since in this scenario we run our EC2 instances in a private subnet without internet access I will setup the endpoints needed. We need endpoints for ec2messages, ssm, ssmmessages, and S3.
Now head over to the VPC section in the AWS console and click on "Endpoints" in menu.
When in the Endpoints section click on "Create Endpoint". In the list of services select "com.amazonaws.eu-west-1.ec2messages" the region part of course depends on you region, select the VPC you like to create the endpoint in and also select the subnets to associate the endpoint with. Don't forget to enable private DNS for the endpoint.


Now we need to assign a security group to the VPC endpoint. The security group need to allow https connections from the ip range of the subnet of the managed instance. In this case we need to allow https access from three subnets since we associate the endpoint with three subnets. Click on "Create a new security group" to create a new one if needed. Select the security group and click "Create endpoint" button.
Now repeat the above steps and create endpoints for "com.amazonaws.eu-west-1.ssm" and "com.amazonaws.eu-west-1.ssmmessages". Optionally also create one for S3, this is not required, S3 is used by SSM to store log information so if you don't feel you need that you can skip it. I will skip that step in this post.
SSM Agent
As the last prerequisite we need to ensure that we install the SSM agent on the instance. The agent is preinstalled on several AMIs:
- Windows Server (all SKUs)
- Amazon Linux
- Amazon Linux 2
- Ubuntu Server 16.04
- Ubuntu Server 18.04
In this scenarion we will use the Amazon Linux AMI.
Create EC2 instance
Now we have created all prerequisites that we need. Now it's time to create the EC2 instance and connect to it.
Head over to the EC2 part of the console and start creating the instance.
Click on Launch instance and then select "Amazon Linux AMI". Select instance size of your choice, I will go with a "t2 micro"
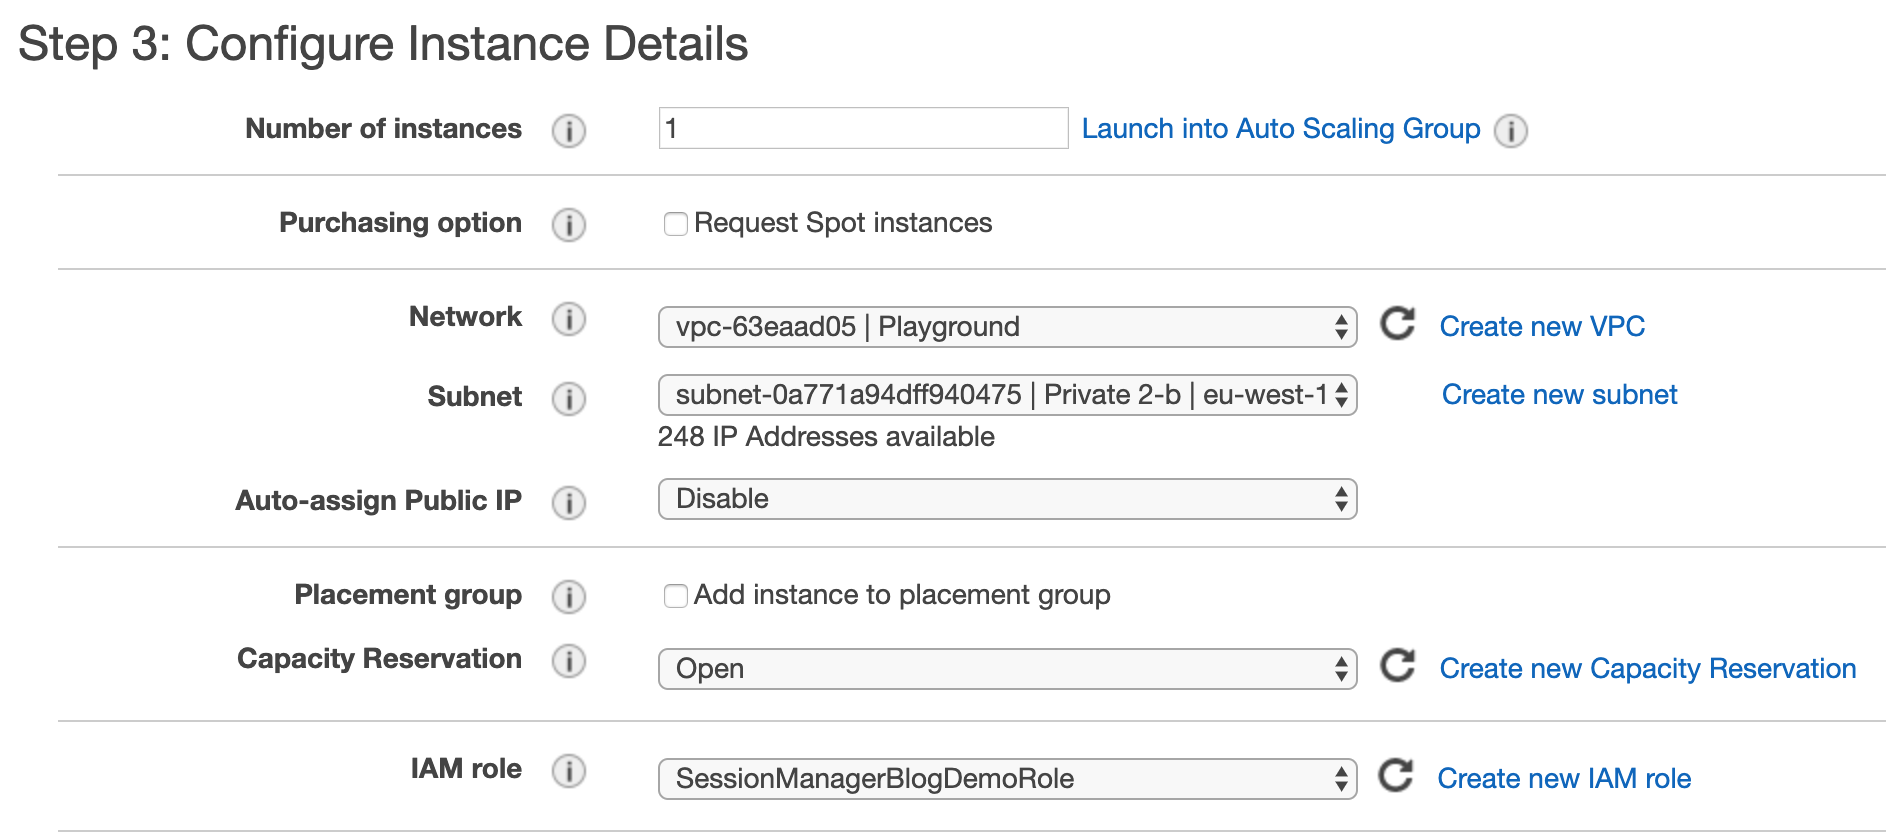
Select to place the instance in the VPC and one of the private subnets where we created our endpoints. Make sure that "auto-assign public ip" is disabled. Next assign the IAM Role with the needed permissions.

Click next through the guide, you should be fine with the default values.
When you reach the "Security group" screen either select an existing one or create a new. You don't need to open any extra ports here for Session Manager to work so default SG should be fine.
Now click "Review and Launch" button followed by the "Launch" button on the next step.
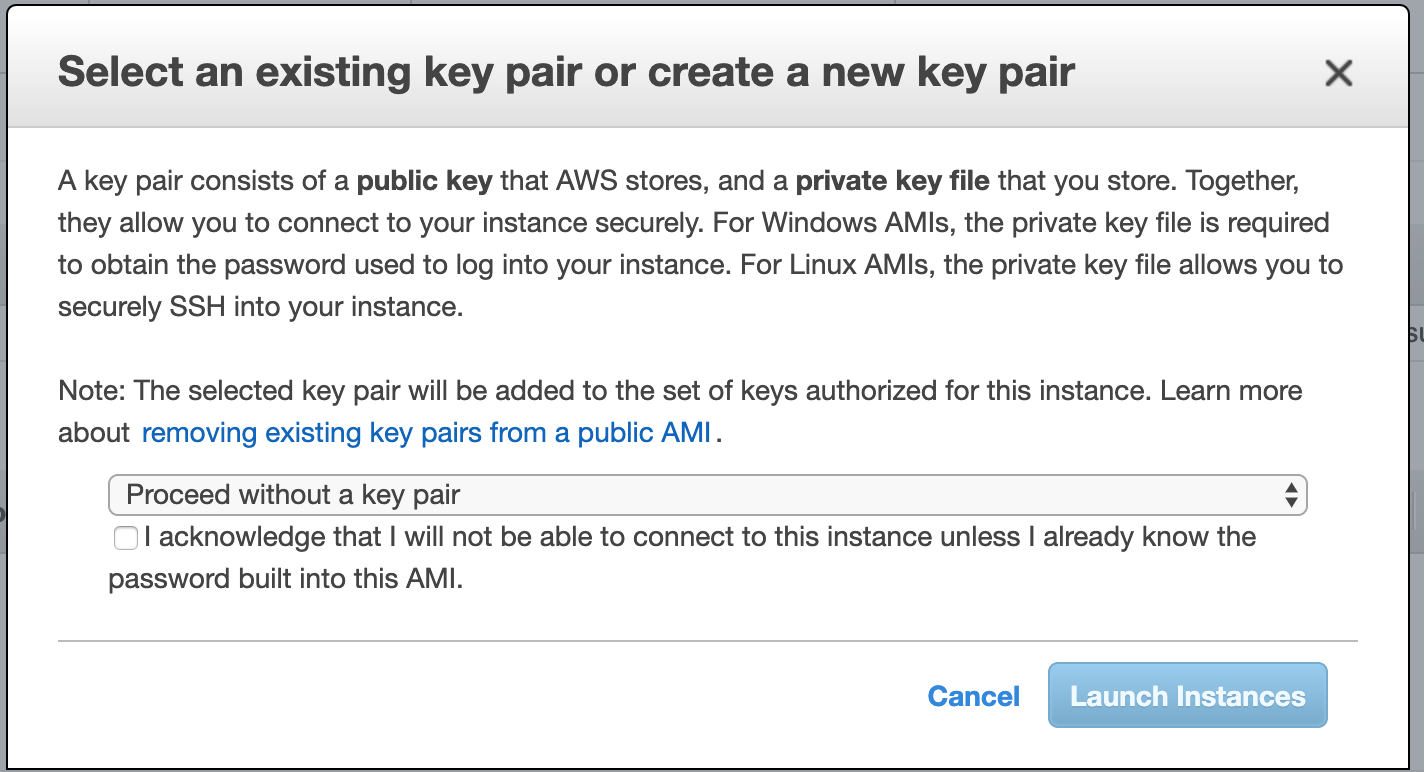
Here you will be prompted to select an SSH key, just for the sake of it select to launch without any SSH key.

Now just launch the instance and wait for it to come online.
Connect to the instance
When the instance is online and up and running head over to the "Systems Manager" section of the console. Click on "Session Manager" in the menu. Click on the "Start Session" button. You should see your instance in the list.

If you don't see the instance in the list one of the prerequisites is not fulfilled and the agent can't communicate with the service. Go back and check each of the prerequisites.
If you see the instance then select it and click "Start session". A new browser tab will open with an SSH shell present. You are now in and can now control the instance as you would over a normal SSH client.
Summary
To summarize, this approach would now allow any of the developers in the team to connect to the EC2 instances without the need of any SSH key or security group modifications to allow their ip address.
The security lies in IAM and access to the AWS console with MFA possibilities, SSO, and more.
