Running VS Code server on AWS
I love coding! I love writing! I love to learn, try, and play around with new AWS services. The problem is that I not always have access to my laptop to code on. I have tried GitHub CodeSpaces but didn't really like the experience. I needed something similar but different.
Goal
The goal was to create a setup that enables me to code from my Android tablet using VS Code. I needed access to a full fletched terminal with SSH, AWS CLI, Git and more. Therefor running it locally on the tablet is not an option, even if that was possible to install and run.
VS Code
VS Code is built from the start as a client and server part. Both the client and server part can run on the same computer, or on different virtual machines. It makes it possible to connect to a server part from basically anywhere, if that is a webclient or standalone.

This allows for remote development through different means, like SSH or a special tunnel mode.
Solution
With the understanding how VS Code is structured it should be fully possible to run the server part on an EC2 instance and connect to it from vscode.dev, using the special tunnel mode. It should the be possible to run this from my Android tablet. To run VS Code on the EC2 instance we will use the VS Code CLI
Create VPC and LaunchTemplate
First of all we need an EC2 instance running, and to have that let's start by creating a basic VPC using a basic Cloudformation template.
AWSTemplateFormatVersion: "2010-09-09"
Transform: AWS::Serverless-2016-10-31
Description: setup basic VPC

Parameters:
  ApplicationName:
    Type: String
  IPSuperSet:
    Type: String
    Description: The IP Superset to use for the VPC CIDR range, e.g 10.0
    Default: "10.0"

Resources:
  ##########################################################################
  #  VPC Base Infrastructure                                               #
  ##########################################################################
  VPC:
    Type: AWS::EC2::VPC
    Properties:
      EnableDnsSupport: true
      EnableDnsHostnames: true
      CidrBlock: !Sub "${IPSuperSet}.0.0/16"
      Tags:
        - Key: Name
          Value: !Ref ApplicationName

  PublicSubnetOne:
    Type: AWS::EC2::Subnet
    Properties:
      AvailabilityZone:
        Fn::Select:
          - 0
          - Fn::GetAZs: { Ref: "AWS::Region" }
      VpcId: !Ref VPC
      CidrBlock: !Sub ${IPSuperSet}.0.0/24
      MapPublicIpOnLaunch: true
      Tags:
        - Key: Name
          Value: !Sub ${ApplicationName}-public-one

  PublicSubnetTwo:
    Type: AWS::EC2::Subnet
    Properties:
      AvailabilityZone:
        Fn::Select:
          - 1
          - Fn::GetAZs: { Ref: "AWS::Region" }
      VpcId: !Ref VPC
      CidrBlock: !Sub ${IPSuperSet}.1.0/24
      MapPublicIpOnLaunch: true
      Tags:
        - Key: Name
          Value: !Sub ${ApplicationName}-public-two

  ##########################################################################
  #  Gateways                                                              #
  ##########################################################################
  InternetGateway:
    Type: AWS::EC2::InternetGateway
    Properties:
      Tags:
        - Key: Name
          Value: !Ref ApplicationName

  GatewayAttachement:
    Type: AWS::EC2::VPCGatewayAttachment
    Properties:
      VpcId: !Ref VPC
      InternetGatewayId: !Ref InternetGateway

  ##########################################################################
  #  Route Tables & Routes                                                 #
  ##########################################################################
  PublicRouteTable:
    Type: AWS::EC2::RouteTable
    Properties:
      VpcId: !Ref VPC
      Tags:
        - Key: Name
          Value: !Sub ${ApplicationName}-public-rt

  PublicRoute:
    Type: AWS::EC2::Route
    DependsOn: GatewayAttachement
    Properties:
      RouteTableId: !Ref PublicRouteTable
      DestinationCidrBlock: 0.0.0.0/0
      GatewayId: !Ref InternetGateway

  PublicSubnetOneRouteTableAssociation:
    Type: AWS::EC2::SubnetRouteTableAssociation
    Properties:
      SubnetId: !Ref PublicSubnetOne
      RouteTableId: !Ref PublicRouteTable

  PublicSubnetTwoRouteTableAssociation:
    Type: AWS::EC2::SubnetRouteTableAssociation
    Properties:
      SubnetId: !Ref PublicSubnetTwo
      RouteTableId: !Ref PublicRouteTable
Next we need to create an EC2 instance and an EBS volume. The EBS volume will be used to store all code, that way we can destroy the EC2 instance and keep all settings and code on the EBS volume. The EBS volume will be mounted during initial boot and also added to fstab so it get remounted if we reboot the instance. To make it easy to create new instances with the same configuration let's use a LaunchTemplate.
We will also install all required components during the initial boot, using a UserScript. We will run everything on Amazon Linux 2023.
We will be using Instance Connect to be able to connect to the instance. Therefor we must add the IP range for Instance Connect to our security group. To find the the IP range we can download the ip-ranges.json.
AWSTemplateFormatVersion: "2010-09-09"
Description: Base setup for VS Code EC2 resources

Parameters:
  AmiId:
    Type: String
    Default: ami-04b1c88a6bbd48f8e # AMI for Amazon Linux 2023 in eu-west-1
  InstanceType:
    Type: String
    Description: Type of instance to use for EC2 runners.
    Default: t3.large
  AvailabilityZone:
    Type: String
    Description: The availability zone to run in
    Default: eu-west-1a
  InfrastructureStackName:
    Type: String
    Description: The name of the stack with the Infrastructure resources

  ServerSecurityGroup:
    Type: AWS::EC2::SecurityGroup
    Properties:
      GroupDescription: EC2 Security Group
      VpcId:
        Fn::ImportValue: !Sub ${InfrastructureStackName}:VpcId
      SecurityGroupIngress:
        - IpProtocol: tcp
          FromPort: 22
          ToPort: 22
          CidrIp: 18.202.216.48/29 # Instance Connect in eu-west-1

  SecurityGroupInboundAllowSelf:
    Type: AWS::EC2::SecurityGroupIngress
    Properties:
      GroupId: !Ref ServerSecurityGroup
      IpProtocol: tcp
      FromPort: "0"
      ToPort: "65535"
      SourceSecurityGroupId: !Ref ServerSecurityGroup

  InstanceRole:
    Type: AWS::IAM::Role
    Properties:
      Policies:
        - PolicyName: AllwoEC2Actions
          PolicyDocument:
            Version: 2012-10-17
            Statement:
              - Effect: Allow
                Action:
                  - ec2:*
                Resource: "*"
      AssumeRolePolicyDocument:
        Version: "2012-10-17"
        Statement:
          - Effect: Allow
            Principal:
              Service:
                - ec2.amazonaws.com
            Action: sts:AssumeRole

  EC2InstanceProfile:
    Type: AWS::IAM::InstanceProfile
    Properties:
      Roles:
        - !Ref InstanceRole

  CodeEbsVolume:
    Type: AWS::EC2::Volume
    Properties:
      AvailabilityZone: !Ref AvailabilityZone
      Encrypted: false
      Size: 32
      VolumeType: gp3

  LaunchTemplate:
    Type: AWS::EC2::LaunchTemplate
    Properties:
      LaunchTemplateData:
        EbsOptimized: True
        IamInstanceProfile:
          Arn: !GetAtt EC2InstanceProfile.Arn
        ImageId: !Ref AmiId
        InstanceType: !Ref InstanceType
        SecurityGroupIds:
          - !GetAtt ServerSecurityGroup.GroupId
        UserData:
          Fn::Base64:
            Fn::Sub: |
              #!/bin/bash -xe
              sudo -s
              yum update -y
              yum install -y jq
              yum install git -y
              TOKEN=$(curl -s -X PUT "http://169.254.169.254/latest/api/token" -H "X-aws-ec2-metadata-token-ttl-seconds: 21600")
              VOLUME_ID=${CodeEbsVolume}
              INSTANCE_ID=$(curl -s -H "X-aws-ec2-metadata-token: $TOKEN" http://169.254.169.254/latest/meta-data/instance-id)
              REGION=$(curl -s -H "X-aws-ec2-metadata-token: $TOKEN" http://169.254.169.254/latest/dynamic/instance-identity/document | jq -r .region)
              aws ec2 attach-volume --volume-id $VOLUME_ID --device /dev/xvdf --instance-id $INSTANCE_ID --region $REGION
              mkdir vscode-data
              chown -R ec2-user:ec2-user /vscode-data
              mount /dev/xvdf /vscode-data
              echo -e "/dev/xvdf /vscode-data xfs  defaults,nofail  0  2" >> /etc/fstab
              curl -Lk 'https://code.visualstudio.com/sha/download?build=stable&os=cli-alpine-x64' --output vscode_cli.tar.gz
              tar -xf vscode_cli.tar.gz
Start up the EC2 instance
Now let's use that LaunchTemplate to start an EC2 instance. This time let's head over to the AWS console to start it up.
Navigate to the EC2 section and select Launch Instance from template from the dropdown menu.
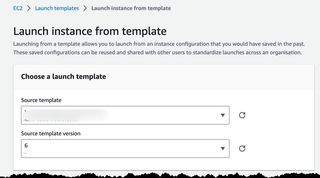
Start by selecting the LaunchTemplate we just created and the version to use, if there is more then one. In my case I have 6 versions and like to use the latest.
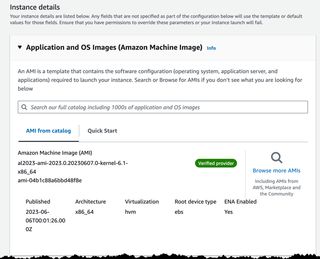
Now scroll down and ensure that the correct AMI is selected, it should be Amazon Linux 2023 AMI.
Finally select a subnet in the VPC we just created, it must the availability zone of the EBS volume we have created. In my case I have created the EBS volume in eu-west-1a so the instance need to be in a subnet in that AZ.
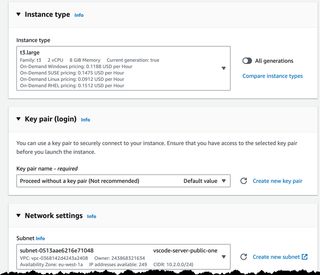
Leave everything else as default and the click Launch Instance
Start VSCode on the instance
With the instance running we now need to start VSCode. We have already downloaded the CLI in the user script. Let's start by connecting to the instance using Instance Connect.
Navigate to the instance and select Connect.
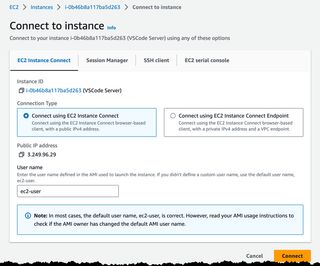
If connection is successful you should see a terminal like this.
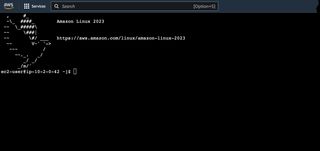
Now we need to start VSCode server using the CLI, we do that with this command.
~/code tunnel --accept-server-license-terms --name vscode-demo-tunnel
Adding --accept-server-license-terms to the command automatically accepts the license terms. We also need to give our tunnel a name, that is done with --name parameter. In the above command we give the tunnel the name vscode-demo-tunnel.
This should now give us a result like this.

What we now need to do is to grant server access, that is done by navigating to highlighted URL. This should take us to this page.
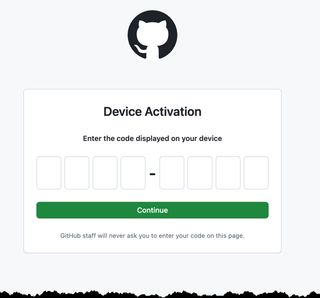
On this page we need to supply the code we were given when starting VSCode server. After an activation we now need to authorize GitHub for the server.
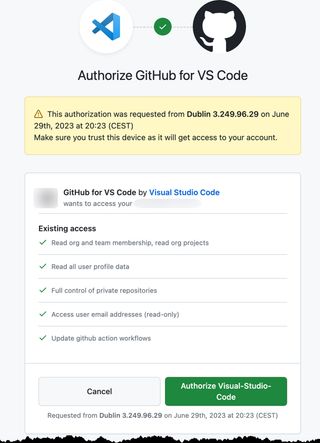
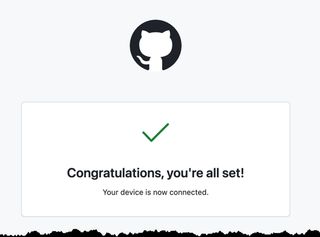
If everything works we should end up at the success page.
Jumping back to the instance connect screen we should now see that the server is running, and a url to connect to it.

Now we can navigate to the highlighted URL, which is basically 'https://vscode.dev/tunnel/tunnel-name'. VSCode should load in the browser window and give us access to a full fledge VSCode editor with terminal access and everything.
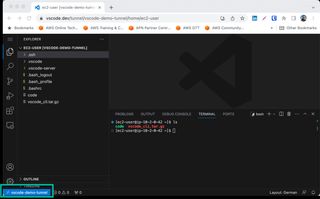
In the lower left corner the connection status is fully visible.
That is what we need to do to get VS Code server running on an EC2 instance allowing us to connect to it from any browser. basically we have created our own hosted version of GitHub CodeSpaces.
But, there are still some improvements we can do.
Adding some extra automation
Connecting to the instance every time using Instance Connect to start the server is not that practical. Doing that from an Android tablet would work but I would rather try and automate that step a bit further.
What would be great is to be able to start VS Code server as a service that can run in the background. So first of all let us create a shell script, named vscodestart.sh, that will start the server.
#!/bin/sh
~/code  tunnel --accept-server-license-terms --name vscode-demo-tunnel
This is just the same command we used when we started it manually. Next we create a Linux service that we can start using systemd so let's create the service file named vscode.service.
[Unit]
After=network.target

[Service]
User=ec2-user
Group=ec2-user
ExecStart=/usr/local/bin/vscodestart.sh

[Install]
WantedBy=default.target
Now let's copy the vscode.service file to /etc/systemd/system/ and vscodestart.sh to /usr/local/bin/. We could now start the server using command:
systemctl start vscode.serviceThis way VS Code server now can run in the background. OK this was now the first step in the automation. For the second step we create a AWS Systems Manager Document that we can run from the AWS CLI or the Console. The SSM Document will then run the start command on the EC2 instance starting the VS Code server service. So we add that to our CloudFormation template.
  StartVCodeServerDocument:
    Type: AWS::SSM::Document
    Properties:
      DocumentType: Command
      Content:
        schemaVersion: "2.2"
        description: Command Document for VS Code start server service
        mainSteps:
          - action: "aws:runShellScript"
            name: "startserver"
            inputs:
              runCommand:
                - sudo systemctl start vscode.service
With the SSM Document in place we can jump into the console and run the Document on our Instance. Even if this is not a fully automated solution it's a step in the right direction. I'm now able to easy start VS Code server on an EC2 instance and write code from any device as long as I have access to an browser.
Gotchas
During the project there was some gotchas and things we must consider. First of all, the very first time a server is started on an EC2 instance we must activate it using the code generated by VS Code server. This makes a fully automated solution a bit harder as we need to connect to the instance the very first time.
We must also consider that there is a limit of 5 Tunnels per GitHub account. That mean that if we start a sixth the first Tunnel will be recycled.
The service terms also only allow the use of VS Code server for personal use or within a company. You are not allowed to host and run it as SaaS solution.
Conclusion and next step
By running VS Code server on an EC2 instance I own I'm now in full control of the cost for it, what access it has, and it give me the possibility to clone all of my repos if I so like. I can now basically write code for any of my project, with very little effort and cost, from any device as long as I can run a browser and have access to internet. This now give me the possibility to code or blog from my Android tablet when I'm on the bus, or anywhere that I don't have access to my laptop.
So what are the next steps? I'm going to create a fully automated setup where I can start and stop server instances from a webpage. This solution will of course be serverless in all parts expect for the EC2 instance it self.
As you saw I'm running the EC2 instance in a public subnet, this due to fact that I need to connect to it the first time I start the server. With the new Instance Connect Endpoint I would be able to connect to the instance even if it's in a private subnet.
Final Words
This was a really fun project. It's really great to see how much you can accomplish with very little code and effort. Stay tuned for more.
Don't forget to follow me on LinkedIn and Twitter for more content, and read rest of my Blogs
